The front wheel on this model is held by two nuts, either end of the
central axle bolt. This rod slips under the trailing arm of the fork
links extending back from the forks themselves. Loosen both bolts and
take one off completely.


Behind each bolt there should be a flat washer.

With both bolts undone, you should be able to free the wheel from the clasp on the trailing arm. If it has not been removed for a number of years, it may take a little jiggling around or even a couple of sharp taps with a wooden mallet etc on the tyre to loosen it enough to break it loose.
When the front wheel is free from the forks, you will see another flat washer, either side that was on the inside of the trailing arm. Beneath that washer, is another nut that is holding the two halfes of the front hub together.

Now you can undo the wheel nuts. these are 14mm and there are two types. Domed nuts are used to hold the wheel rim to the hub. Normal nuts are used to hold the rims together. 8 in total, 4 of each kind.

I broke one of the studs which connect to rims together. This will now have to be removed by grinding off the broken stud and the head on the other side. Punched and drilled out and a new stud welded in. another job we didn't plan for.


But at least the rims are now separated from the hub. These rims, once repaired can go for blasting and painting.
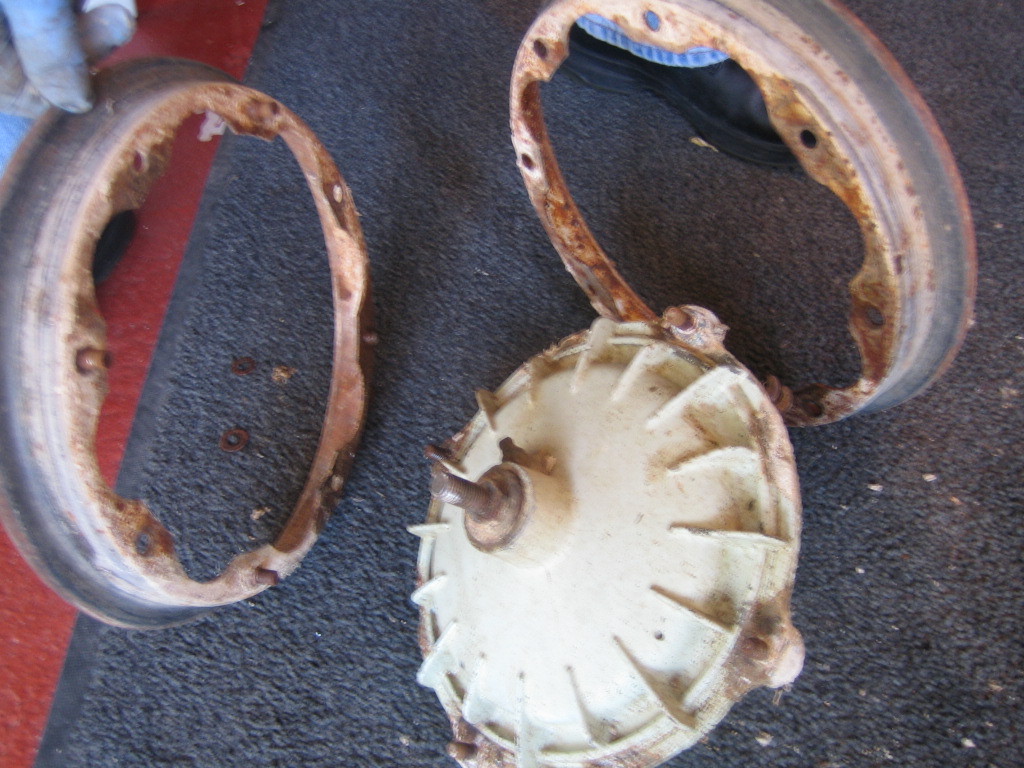
To split the hub open, you need to remove the nuts from either side. One can be just loose, the other will have to be removed completely.

You can see under each nut is a flat washer.

And with once side removed, you can tap out the bar with a wooden or rubber mallet.


Quite incredibly, this front wheel appears to have brand new seals, bearings and brake pads. Now this might be a blessing, because it may simply be a case of masking off the inside of this wheel and painting the outside, as it would have been in the factory. If we were powder coating this wheel, the seals and bearings would all have to come out because of the damage caused to them if they were in situ during the very hot powder coating process.
I shall ask advice about this before creating work that might not need to be done.

However, the brand new brake pads and mechanism WILL have to be removed. I know for a fact that the hub cannot be painted with these in place.
Firstly, remove the circlips on both brake shoe pivot bolts.

Under which, you will find a sprung pressure plate and flat metal retaining plate.

Now you have to pry out the shoe spring. It's tough, but the way I do it is to use a screwdriver to push one end of the springs wire to the hole and down. the spring just pops out when you get it right.

Now remove the circlip from the brake arm.

And remove the brake arm.

Under which, you will find a flat spacer washer.

You can now pull out the brake pivot mechanism.

And remove the grease nipples.


Now undo the speedo cable fitting and draw out the entire speedo mechanism, grub and drive etc. Check the condition of this, it may be serviceable, but if not, replacement parts are readily available.


Part numbers for front wheel as follows:
Wheel front hub left hand side
19.04.4120 (Innocenti Logo)
FPB A - 1559 7
Wheel front hub right hand side
(Innocenti Logo) 19.04.4140
FPB A - 1625 4
No comments:
Post a Comment
Please keep it friendly.