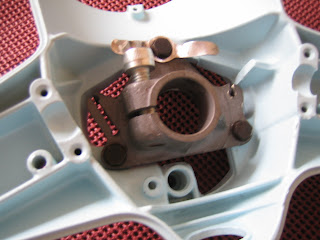
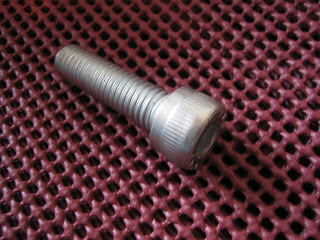
The components required for adding the headset bottom to the fork tube
steering column are shown below. The clamp, 3 specific 10mm headed nuts
and bolts, washers and cable clip are unique for this job only. The
clamp goes on the INSIDE of the headset bottom and lines up with the 3
holes in the casting...
...as seen here.
Place the clamp inside the headset bottom as shown.
Here is a close up of the correct nuts for the job. Both nut and bolt are 10mm headed and the bolt is only part threaded. Each set has two wavy washers.
The cable clip is not perfect and new ones can be bought, but this is the original one cleaned up and I want to keep it.
Push the nuts through the clamp and headset bottom from the inside with one washer in place. From the underside, use another washer and finger tighten the nut. Repeat for all three.
This picture shows the location and orientation of the cable cip.
Remove the large allen type bolt from the clamp as the bolt shaft is meant to go in to a slot in the steering column. With the bolt in place, the clamp will not slip over the column.
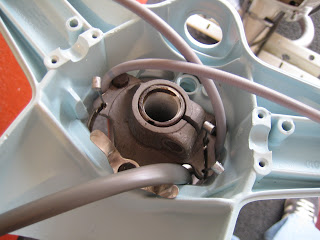
Push the headset bottom down, on to the steering column and arrange your cable ends in to the relevent slots. The gear change slots are located in the clamp to the right in the image below. The throttle cable to the left. The front brake and clutch cables fit in to the cutaway to the rear of the clamp, the clutch being the one in front.
For now, I have tucked them through the headset bottom housing to give an idea of where they go.
Note the location of the wiring loom as it enters the headset bottom.
Once everything is more or less in place, check the headset bottom is down nice and close to the chrome ring. There should only be a gap of around 1mm or two.
(Note:, the image below seems to make the chrome ring look a bit wavy. I can assure you it is perfectly flat as you will see in later shots.)
Now tighten up the large allen bolt with the appropriate key. This bolt needs to be very tight. I tighten mine by hand until it will defintely go no further and then use a large lump hammer to give it an extra bit. It is essential this bolt never comes loose of its own accord.
But before final tightening...
...get it tight enough to turn the handlebars and wheel and then check that the gap between the chrome ring is fine...
...and that the position of the handlebars is in line with the front wheel. No good having the handlebars pointing forward if the wheel is pointing to the left or right. I use a long metal ruler accross the forks and check using a laser point measure that the distances are the same. You can get these from any DIY store. I think they are primarily used for decorating.
Finally tighten it up.
Place the wiring loom under the cable clip as shown.
The headset bottom is on. Quite exciting. It's the first coloured part of the scooter to be added.


