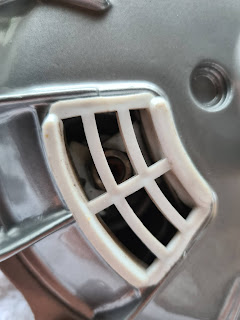
After a bit of faffing about trying to get my Casa Lambretta actuator to arrive, it finally showed up.
Apparently, their system couldn't find my payment so the order wasn't dispatched and it hadn't even raised the problem with Casa until I rang to chase it up. Well, after being asked to prove I had paid and sending them screenshots of the debit from my account, they finally got around to packaging it off to me and it arrived today. Now I can crack on with things.
Tested it for fit and I have to say, it's perfect! Nice strong spring too.
So, first things first, we must temporarily remove the locking adjuster, accessed from inside the hub window.
If you recall, the static brake pad is already in place, so now we install the second (floating) pad. It should slide comfortably down the chamber and come to rest flat against the disc itself.
It should look like this when in place. Next, to avoid any noise from the brakes, I'm adding a small amount of copper grease to the back plate of the floating pad.
Now, I can install the actuator arm mechanism.
It's easy to figure out how it fits as there are tabs on the actuator that correspond with slots cut in the channel it fits into. The "hook" for the brake cable needs to be furthest away from the outer cable stopper. And secure it in place with the circlip.
Now we can re-install the adjuster. After removing one of the 'windows' on the main hub side, insert the adjuster grub screw and tighten down using an allen key. When you feel it stop against the disc so that it will not tighten any further, back it off a quarter to half a turn only.
Before fixing in place, make sure that when you turn the hub by hand, the grub screw does not catch on the housing here (below).
Some brake pads, especially when new are quite FAT, so it may be necessary to remove material from this grub screw at the end that touches the brake disc in order to shorten it slightly. Don't go mad, only a little is required and it's easy to keep checking.
Once you are happy with it's position and also satisfied the disc turns without catching anywhere, you can press the actuator arm with your thumb as you turn it, and you should feel the brakes working and the hub should no longer rotate. Spend time setting it up correctly, it's easier to do it like this than on the scooter.
Once you are happy, drop the locking plate back into position.
Now, whilst holding the grub screw dead still with an allen key, lock it up using a 13mm spanner to secure it all in this position.
The window can go back on now for a long time hopefully.
Now you can pop the 'I' cap in its place to cover up the actuator and you are done. Mine had to be tapped home with a rubber mallet. They are normally quite tight but I think also the paint and clear coats don't help matters. Be careful though, some of the remade caps are very thin and could easily dent.
And there we have it. One fully re-furbished, original Campagnolo Lambretta front disc brake all ready for the road again.
I hope you found this helpful and get some use out of it.
Thanks for reading, Paul.


