Before I can take off the legshields, it is necessary to remove the rear brake foot pedal.
From underneath the scooter, on the kickstart side, you will see it is
attached to the front strut. The pedal itself actually pivots on a bolt
welded to the frame. The lever has two pegs as part of the casting. One
longer than the other. The forward and longest peg acts as a stop by
coming to rest on the frame strut when the brake is not in use. The
second, shorter peg activates a plunger in the switch housing to operate
the rear brake light.
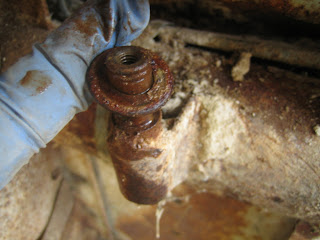
Below, you can see the light switch being removed. It is held in place by two threaded bolts passing through the strut, which are fixed with two nuts and flat washers. On this scooter, they were seized solid and had to be ground off. Not to worry, these form part of the kit that will come with a new switch.
With the switch off, pull away the protective rubber cap and remove the wire bullet connector. Some switches have two bullet connectors, this one has only a pink live feed as the switch itself acts as an earth when attached to the frame.
Next, remove the grease nipple from the end of the brake pivot bolt.
Behind that, you will see a circlip. This one has a leg worn away, but it needs to come off anyway. Circlip pliers are required unless you want to lever it off and damage the circlip. This circlip is seated in a groove cut toward the end of the pivot bolt.
Under the circlip is a flat washer.
Now remove the pivot spring by inserting a screwdriver under it and lever it downward. You can then let it spring back off of the lever. With the spring off, you can now lift off the brake pedal.
The other end of the spring is seated in a hole in the lug that is welded to the frame and holds the pivot bolt. You can just see below, how the end of the spring is fed in to it. Rotate the spring anti clockwise to release it and remove it.
Here is a shot of the hole without the spring.
Behind the brake lever is another flat washer.
On an original brake lever, you should see a "CA" logo under the pedal itself.
And also cast on the the lever arm.
As well as the Innocenti "I" Logo.


