It is now time to add the control cables etc at the engine end of the scooter only. For now, I will be adding the trunnions without paying attention to how long the inner cables need to be etc and this is only required later. The purpose of this stage is to be able to route the outer cables correctly.
THROTTLE CABLE
Your throttle cable may have no
nipple on the end as some come with an adjustable nipple at either the
top or bottom, depending upon the supplier. I prefer this type as shown
as it is more closely related to the original one.
Slip the cable through your rubber raiser...


Push the rubber down the cable and slot the cable under the canopy lip as indicated below.

Push the inner cable through the throttle adjuster on the carb...

And through the slot in the throttle cab lever.
You may wish to test the lever works by pulling on the inner cable at the other end.

This is where the rubber lifter is fitted and it can now be held in position with an aluminium cable tie. The tie only holds down the throttle cable at this position and nothing else.

The throttle cable passes over the top of the frame, roughly as shown. We will tidy this up later when the forks and headset are fitted, so it isn't important right now to get it exactly right.

Tape it in roughly this position at the headset for now.

GEAR CHANGE CABLES
Two trunions are required to secure the gear cables. Note that one is longer than the other. This is because the larger one also passes through the gear change link arm from the engine and thus, needs to be deeper.

Pass a gear change cable under the lip of the frame canopy and through the cable clip as shown...

Push the outer cable in to the adjuster at the rear (inside) of the adjuster block as shown below. This cable will now operate FIRST and NEUTRAL gears.

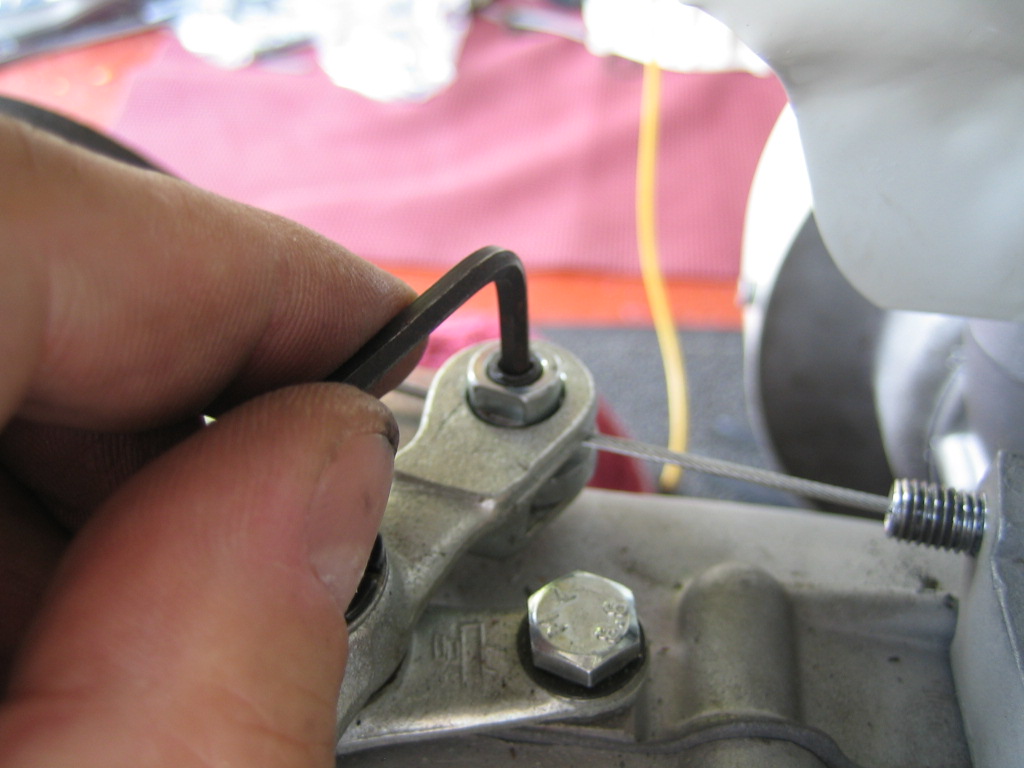
Select the longer trunion and undo the allen key bolt to allow access through the hole shown.

Place the trunion in to the adjuster and the gear selector arm as shown. Make sure that the hole in the trunion is pointing at the cable.

Now pass the inner cable through the trunion...

And ONLY nip up the bolt enough just to hold the cable in place.
Repeat the stages above with the gear cable nearest to you on the kickstart side (offside) of the scooter. This will now be the cable for selecting NEUTRAL, SECOND, THIRD & FOURTH GEAR.


Make sure the cables are routed as shown.

CLUTCH CABLE
Repeat steps as above and pass through the uppermost adjuster in the adjuster block as shown here...

Pull the clutch lever forward by hand and insert and nip on a trunion. Feed the outer back as previously indicated and tape them up at the headset just to hold them out of the way for now. We will complete the routing and fastening them down later, when the headset is on.

REAR BRAKE CABLE
Here are the component parts at the rear of the scooter. Not the two 'top hat' retaining cups.

The first top hat goes in to the hole at the rear of the frame. Sorry for the blurred photograph. I think it can just about be used as reference.

Feed the cable forward behind the engine mount and in to the clip on the engine...

...which you should find fixed under the cable control adjuster block at the rear (inside) of the engine block.

Push the inner cable in to the top hat at the rear of the scooter

Pull the inner cable through and make a bend on the end like so...

Push your bolt through the adjuster cover and on to the inner cable as shown.

Notice that the adjuster boy half of the rear adjuster is sided. This cutaway section goes upward as shown.

Fit the cover, with cable and bolt, on to the adjuster.
Tighten with the nut and flat washer. You can tighten as much as you like. The cable needs to be as secure as possible.

Fit the second top hat in the lug just to the front of the frame canopy where shown.

Feed the outer cable through the cable clip as show (I have removed the control cables so you can see), through the frame canopy and in to the top hat.

All the cables sit in this clip as shown.

That will do for now. We will attach the other end of the brake cable once the legshields are on.
